My little Angels not

My little Angels not
2009 Spring

blog background

Followers

Friday, 4 March 2011

A challenge and my 2 ATCs

Well I was making a get well card and I used Bugaboo image and I though I play along BUT I messed it up and my card looks a bit different from others lol Can you spot the mistake? I bet you can't it's a happy accident and my card turned out just fine. The theme is Green with envy, in Hungary we used yellow for this expression lol

Now my card, I have rotated the sketch inside my card, no one said it's got to be on the front of the card lol
 Recipe
Bugaboo image
TLC Creations WA
New embossing/die cut folder
TH distress inks
Pro marker
Water colour pencils
Marianne swirl die
Crochet flower by my mum
Button
Multi shaper all-deco punch

I had to do loads of inking then embossing/cutting then more inking and emboss/cut the card too then front was ready just few bits to decorate and woala there is the front of the card lol Now inside. I tell you once I finished my card I realised I forgot to do the sketch and my topper was already stuck inside SO I worked round it and there is my sketch. So I had a happy accident and you know what I LIKE it this way.

So here is the inside. The ribbon is paper I made and stamped on it and the little dots been cut with a small bunch then embossed from the back. The edge of the topper is coloured with pro-markers and the outside of the card is punched paper ribbon too.


Now onto my ATCs. The 1st one is Baby Bud image what you can get from the Etsy shop she is my fav one: Rose Bud she is gorgeous and so easy to colour her. I coloured her with water colour pencils then cut her out with Nest. The BP/DP is Bearly Mine Shabby Vintage what I torn end edged it with my Tim Holtz distress ink, few pearls to finish it off
My 2nd ATC is a very simple one. Some scrap paper as background, and die cut corner what was left over from my altered shoe box and the sentiment was printed out and was waitting to be use and because the ATCs had to be rubby colour it was just screaming to be used lol oh my WA is from TLC Creations

That's all for today, off to make an other card lol
thanks popping by
hugs
Ildiko


Delicious Doodles challenge & D2D challenge

It's gonna be two card from me again lol Sorry guys I'm on the roll. Got one more to blog and 2 ATCs. Just spitting cards out at the mo, today I made DD card and 2 ATCs and just got to put together an other card, so much in a day. Makes such a different both kids at nursery on Wednesday&Thursday.
Over at Delicious Doodles the theme is easy: make a birthday card you like to receive lol now I'm sure you can do that.
Here is what I made

Recipe

DD image:Bee and flower
Spellbinder die
Bearly mine paper
TLC WA
Ribbon from stash
TH Mustared Seed distress ink
Glitter
Shakura Souffle pen
Shakura gel pen

This was so fun to make. I just love this sweet bee image. Bit of glitter on his wing to glam him up lol and the flower stalk is done with the green Souffle pen, bit of ribbon WA and done. I'm gonna enter this card into the Bearly Mine Challenge where the themme is: Birthday card. I just bought this set of paper: Spring Flight and I LOVE it


 I had to tkae a pic without my daylight light to get the real colour of the WA lol
 Does have a bit of dimension


And here is my 2nd card for today. I'm gonna enter this to the "Daffodils" Free Stamp of the Month Challenge over at D2D
I had to buy the image but I LOVE the outcome. Such a simple flower and looks stunning, well I do love daffodils. I took my pic under a day light lamp and I'm over the moon how nice the pick came out. The paper I used is Bearly Mine Designs, just bought the set.

And here is the close up of the flower pot. I tried to use bright spring colours

Thanks popping by
hugs
Ildiko

Wednesday, 2 March 2011

Inspired by song over at TIOT

Now this was such a fun. Pat my teamie at TIOT was the one who gave us this theme. I knew what I wanted to make I just had to find the right song. I even knew what artist the song is got to be just wasn't sure if I would find the right song. We I did. First here is my song
Elvis Presley: Life

Somewhere out in empty space,
long before the human race,
Something stirred,
A vast and timeless source began,
Intelligence was born and then,
there was the world,
Powers filled the universe,
matter formed and broke the curse,
Of nothingness,
Love became an ageless soul,
nature reached her highest goal,
And breathed the breath of life,
Everlasting life.

Well creatures come from out of sight,
Daylight came from in the night,
and all was good,
Life became a masterplan,
Love produced the perfect man,
that understood,
The image of the makers word,
worshipped him with all he had,
But then one day,
From in the depths an evil seed,
grew and manufactured greed,
That changed the way of life,
Everlasting life,

Oh the loving power looked and saw,
Inside the heart of man a flaw,
began to grow,
Well, the fires of hell began to burn,
and so he sent his chosen son,
To let us know,
That love had surely made us all,
and hate would surely make us fall,
So from the cross,
Well he showed the world that dreadful day,
That love could be the only way,
or all is lost of life,
Everlasting life,
For life is love,
And love is life.

The image I used is from a brand new digi company called Wax Fruit Company and the set of images are called: New beginnings

And my card
Recipe
WFC "New Beginnings" digi
TH Distress inks
Glitterbabe's "Dahlia"
Flower punch
Marianne swirls die
New embossing-die folder
Flat pears from stash
Water colour pencils

I have no idea how this new embossing folder called it's my friends but I LOVE it. I inked the inside before I cut it to get the ice effect on the embossing. The cut out was used for inside, waist not lol Then I done my WA with the Dahlia in the middle few flowers with pearl and the swirl to finish it off and that's it. It was a siple card or wasn't it lol

 You can see inside how beautifully is the embossing
 and just a nice cllose up
 and a close up on the WA/dahlia
 Side view so you can see the dimension oh and I forgot, the reason why I used this image because a new life is coming out of a seed turning into a young tree then a mature one with an other life (nest with eggs) on it. This set is just GORGEOUS, unusual.

Thanks popping by
hugs
Ildiko

Sunday, 27 February 2011

Show me #13 and Delicious Doodle Challenge

Over at Sassy Cheryl's you got to take a pic of your desk/what you work on. I took mine two days ago when  I was making a quick card well maybe 3 days ago anyway this is what I was working on

When I watch telly night time I like sitting on the setti and use the kids plastic table to craft on. Big enough and easy to clean off. What you see on the table are my fav things: my water colouring pencils in an altered jar, my TH distress inks and cut&dry foam, in a little pot in the top left corner what I use everyday and of course my big cup of fruit/herb tea lol oh and few more essentials
And here is the finished card. I love the image and I hope Arielle from Wax Fruit Company drew this flower with little bugs on it for the lady bug cos that's how I interpret it lol and of course the WA is no other then TLC Creations, ribbon&button from stash. WFC is a new digi company and I love this new style. This one I was working on is just a flower BUT there are others I have not seen anywhere , go and check it out in her shop. Oh and I forgot there was a little challenge Arielle set up. Whoever was the 5 quickest one to make a card with this sweetie received her new one for free, and I was the 2nd quickest one lol so I've got an other fab image in my collection from WFC
Since this card fits perfectly Bunny Zoe's Challenge: Spring/flowers I will enter it into the challenge

Now onto my 2nd post. Usually I only show you one card but I really need to post this too and for tomorrow will have an other one to post and an other one on Tuesday, see I MUST post now. Well anyway the Delicious Doodle's challenge started on Friday and I set the theme: make your own button and use it on your card. Now making a button is nothing, the options are endless. You can use paper, clay you bake , air dry clay, shrink plastic, cork just to give you few ideas. In the past I used cork this time I used air drying clay. I had such a fun making my buttons. I made extras to to use later. I think the best thing is when you make your own buttons you can make the exact colour you need.
 Recipe
Air drying clay
Delicious Doodles Griffin digi
Flat pearl from stash
Cord&hand made paper from stash
Gold paint
TH distress inks

I don't know what abt you but I really like this Griffin. He was realised on Saturday so if you like him pop over the Delicious Doodle shop or if you like cute ones.  I didn't do much to the Griffin only tiny bit of colouring. then I made a mask and with a brush a dabbed some colour round it. Once I was happy with my image I edged it with gold ink and tore the bottom in an angle, then cut the hand made paper and torn the bottom in an angle too. Before I glued together I put the cord on it and black inked the bottom of the griffin. I coloured my hand made buttons slightly after it's dried and topped it with gold to give a bit of old look to it, then but the cord through. What left from the cord (waist not) I tied it on the other cord under Griffin. And to finish it off of course I used TLC Creations WA

Here is a close up of my buttons, when I rolled my clay out cut it to the size I liked it and stamped over it then I pierced it.

Thanks popping by
hugs
Ildiko

Saturday, 26 February 2011

Baby Bud challenge 5 and a freebie

Well it's the time of the month to have our next challenge at Baby Bud Designs with a freebie thrown in(only for a day though). The theme is an easy one: ribbons or bows or both. For this challenge I used Lil Bud
 Recipe

Lil Bud image
Bearly Mine Shabby Vintage papers
Marianne die
TLC Creations WA
Water colour pencils
Tim Holtz ink
Paper doily
Ribbon&flat pearl from stash

It's a very simple and quick card. I did marry it up with a TLC digi and I love how the two of them turned out. I printed the Bearly Mine Shabby Vintage paper on a good card stock and that's what I used as a base and just inked the edge up a  bit. I inked the edge of the doily paper too and glued it on to my base card. Got my ribbons and placed it into place then I stuck my image on with gel glue to give a bit of dimension to it. to finish it off I used die cut swirls and few flat pearl. I have to say Lil Bud turned out fab. There is a close up below for you.
and here is a side view to see the dimension better.

I'm gonna enter my card into the fallowing challenges

Bearly mine: Pearl&bow
Paper Play Ch lets get sentimental
Party Time Tuesday: Anything goes
Thanks popping by
hugs
Ildiko

Friday, 25 February 2011

Altered shoe box over at TIOT

I forgot to post my shoe box. I think this week I set the bar bit to high, sorry peeps lol I love altering and I thought loads of us use shoe box to store bits and bobs, but maybe I was wrong. Well anyway I used a very tired shoebox and it turned out not to bed. I think I'm gonna give it away as a present. Once I finished it didn't know where to put it, while I was making it my next door neighbour gave me a storage of drawers full of embellishments (can you believe she gave up crafting, I would end up in a white jacket if I were to do that lol ) so after that my box have no room.
Here is my box the picture doesn't show justice
 Recipe

Shoe box lol
Paper towel
Tolet rolls
Spellbinder corner & border die cut
News paper
Black acrylic paint
Gold paint
Red&black TH ink

First I coverd my box with paper mache and glue some bits of paper on it all over the place then I let it dry for few days. Once it was dry I panted it with black paint carefully leaving the paper bits out, when my paint was dry with my finger I put some gold paint on. I cut some corners out and the other bits what I imked up and covered with gold thinly and decorated my box with it and when it was dry I put the rolls inside. Oh yeah gave some feet for my box as well. Below the close up of the corners

Here you can see the gold shimmer nicely. The truth is it is much better in real

If you like to see what my brill teamyie came up with pop over to TIOT

Thanks popping by

hugs
Ildiko

Thursday, 24 February 2011

Sassy Cheryl's image

I was such an Idiot lol I forgot to take a pic  and enter the Sassy Cheryl's Challenge, well I will still show you my card. I was kindly told on PCP that it still matches this week theme so after all I can still enter. Yiiiiipy
So here is my card

 Recepi

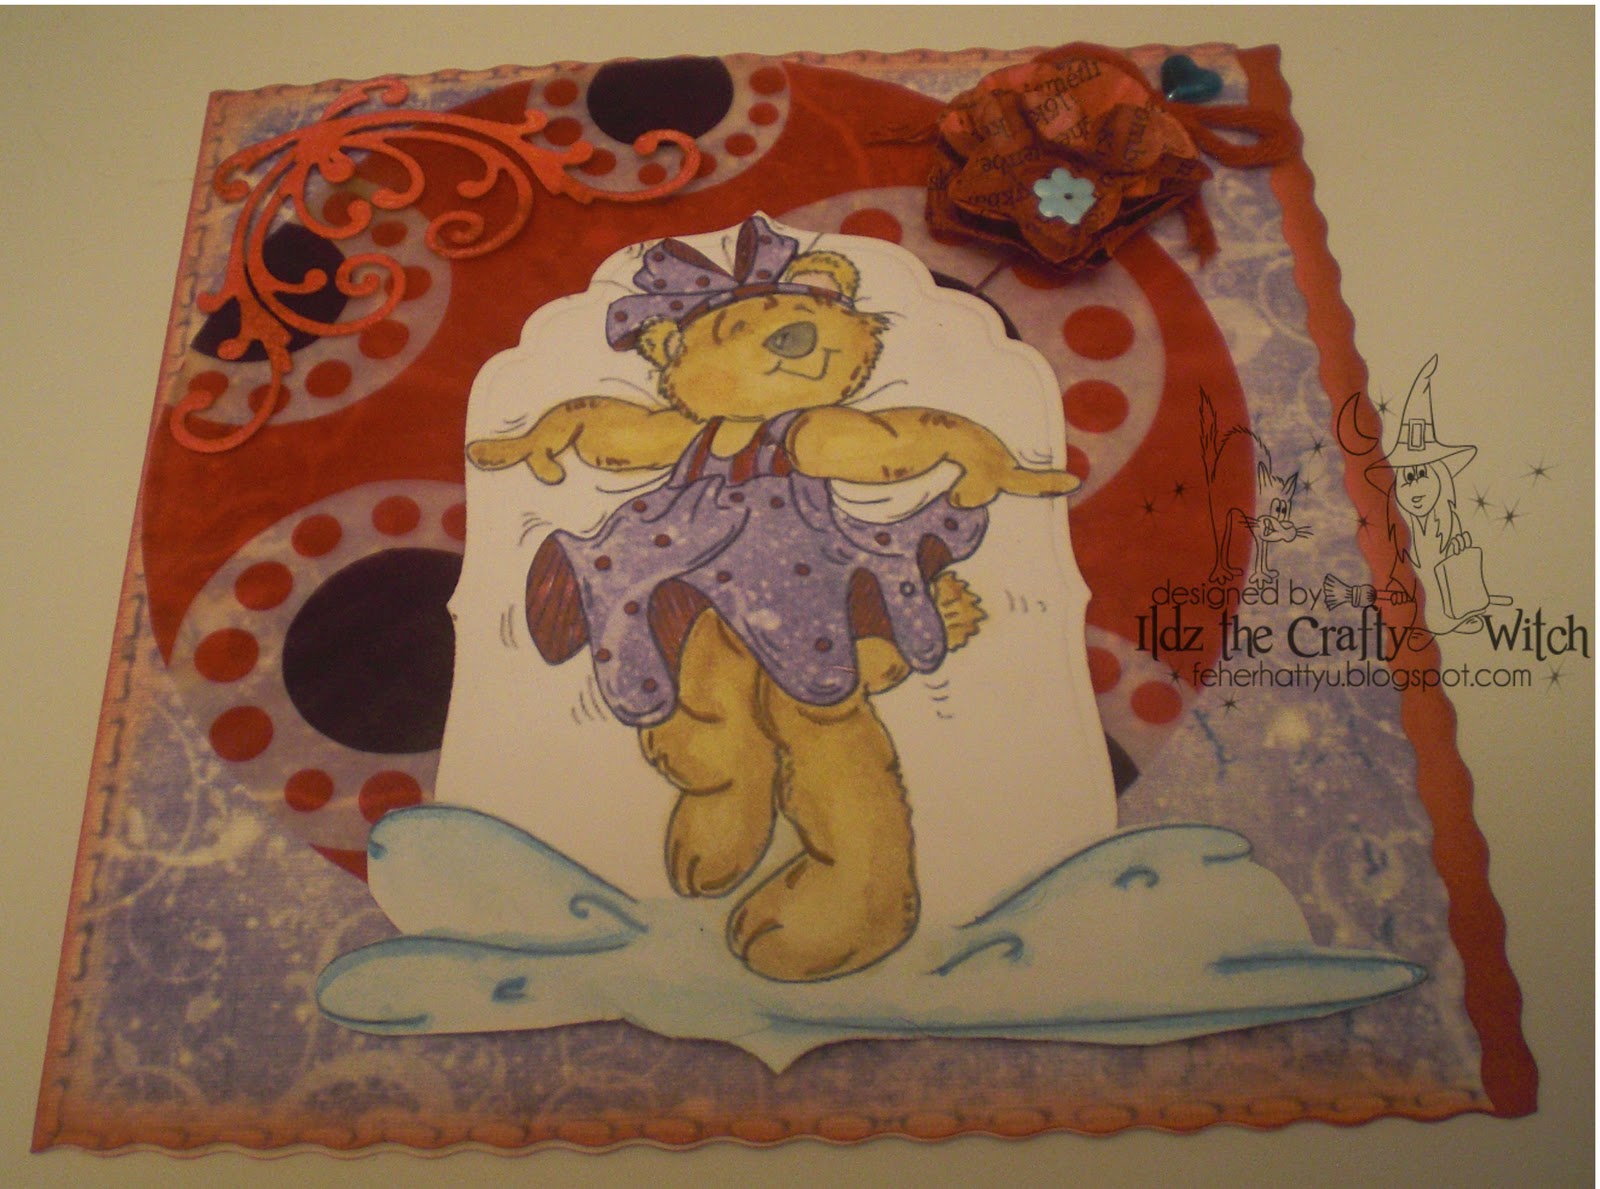
Sassy Cheryl image:Bear dance
Nesti
Water colour pencils
Shakura glitter pen
Recycled thread/yarn, book pages&cupcake paper

I printed Bearly Mine paper on a heavy card stock and cut it round but I left the back bit a bit longer cos I wanted to ink the edge (you can see below). Please don't laugh (my friend and my other half did) when my friend made cupcake and brought few round I saved my paper cose I loved it soooooooo much. My OH was laughing when seen me cleaning the paper lol but I think it looks so god on the card. The flower is an old book and just cut the same size 3 times then inked it up and in the middle I put a blue flower to match it with the puddle. For me bow I used recycled yarn and poked a pearl heart pin through. The cute bear's dress is paper pieced and the rest is water coloured and on the dots and the under the skirt I used red glitter Sakura pen. To finish off I cut 2 swirl but one of them by mistake mowed and did not wanted to through it away so I fiddled with it and the 2 swirl turned into corner
Bit of a close up on the gorgeous bear.

Here is a close up of the corner.
I'm gonna enter in to the fallowing challenges
Bearly mine CH#4: Pearls&Ribbon (Is my yarn counts as ribbon?)
Sassy Cheryl's CH#52:Spring or Easter

Thanks popping by
hugs
Ildiko