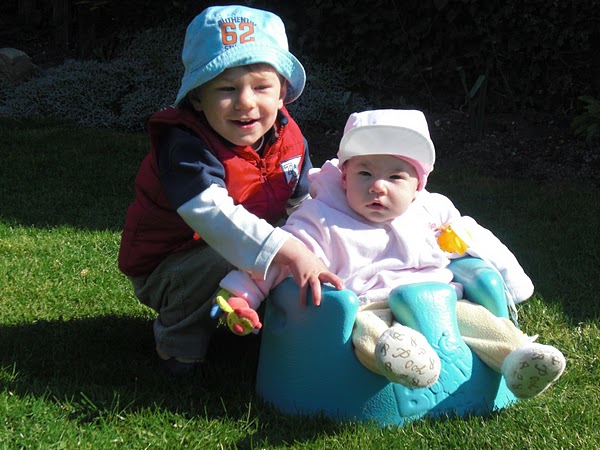
My little Angels not

My little Angels not
2009 Spring

blog background

Followers

Monday, 7 September 2009

Ribbon rail

I had enough of not be able to see my ribbons. So Saturday I went to B&Q and Homebase and bought few bits.

Ingredients:

240cm long wood cut in half

240cm long round wood cut in 5

No nail glue

Mug hooks

Small pot of yellow paint

1 Coat hanger

Raffia from shad

I had to go out and buy more mug hook but bought smaller ones pack of 25 it's not on the pick
The unpainted wood whats my base been glued on with No more nail

I painted it and screwed the hooks in every 10cm. One place there is a 20cm gap where I bended a coat hanger and out of the remaining I made hooks (forgot to buy it and I was to lazy to go out and buy some so I improvised). I think the coat hanger can't take the weight so I got to get more round wood to replace it.
Onto the bottom bit I put raffia where I can hang my small bits of ribbon and on the side put some screwed rings where I put more ribbons lol

Just from a different angle.

And here it is!
All my ribbons, well almost all, my thin ones didn't feet so still in box but I can see those as got little window on it.

Took me soooooooooooooo long to organise my ribbons. Most of it just were in the box folded up. I had to make a middle out of hard paper (Recycled kitchen towel roll, loo roll and the left over from the wrapping paper), took me abt 8-10 hrs to have my ribbons ready to go on the holder

Close up on top bit

Close up on middle section

Close up on bottom section


I knew I got some ribbon but never thought I got so many. Now I can use my beauties. I hardly used them as I didn't know what do I have.


Making this rack didn't take long. The paint is not wood paint but it done the trick for me. I didn't spend more than £20 to make it. I'm very proud of my handy work. Everyone can make this. I didn't use drill, didn't use screwdriver.


We don't need hubby's help all the time plus if I would've asked it would've taken him month to make it lol Took me a weekend cos my ribbons weren't on the reel.

Friday, 4 September 2009

My first blog award


My First blog award thanks to Wendy. Wendy helped me a lot when I started my blog. She made my banner and I love it sooooooooo much. Go and have a look at her blog she a very talented lady.
I'd like to pass this awar to
Have a look these ladies blogs they are stunning

My first live crafting

I was brave and done a live crafting on Crafters Companion. Did make few mistake but it was my first time so hopefully they forgive me.

I thought we got so many little scrap paper what we can use, so I made a sort of Jigsaw card.

First I made my design on a bit of paper, done my measurements and just went for it.
I haven't got sewing machine so I used a black pen and made fake stitches on my card.
My finished card. I even used sweet/candy wrapper. Few topper are recycled from last yrs Xmas card.

And inside. I found some foam embellishment in my stash and I thought it's really cute, bit of peel off and insert and DONE

Saturday, 29 August 2009

Tuesday Taggers Challenge

This week at Tuesday Taggers we had to alter a bottle or jar. Well mine is not quit a jar it's a plastic container where I keep my flower softs. When I eat Humus or any dip I keep the container and I put my flower soft in it. They see through so I can see which colour in it and I stack them on top of each other. I always wanted to decorate it so this week challenge gave a reason to start off.
I have used:
Red peel off pen
Ribbons&beads from stash
Flower&Circle punch
Carol's cube
For the front flower I put bit of flower soft whats in the pot so I know which colour is in there. The top is coloured with my red peel off pen. I punched a circle out and used the flower from Carol's cube.

Crafters Companion Challenge 4 and my forgotten Tuesday Taggers

Christine at Crafters Companion gave us this for the fortnight to work on and Tuesday Taggers, what I forgot to post, theme was retro.
I have used:
Crafters Companion stamps
Do craft Retro stamps
Brads, charm, ribbon from stash
Punches for inside
This is a close up on my flowers. I coloured my brad with my peel off pan. The peel off pen is sooooooooo versatile just fab I love using it.
My backing papers stamped with my Retro stamps. I hardly ever use them, I bought it cos for the set I paid £5 instead of £20. Got great stamps in the set 20 little ones.
I put an other little duckie inside and for the insert I used my punches and a blue pen to give a bit of edge.

Monday, 17 August 2009

4 in 1

What a disaster!!!! I went on holiday and my Other Half took my stuff upstairs now I can't find anything.
The four challenges I done in one are: Crafters Companion, Tuesday Taggers, Copic Colour Challenge and Coloure Creat Challenge.

I have used:
Popcorn CD&stamp
Copic markers
gems
silver peel off
Theme at Tuesday Taggers Birds&Bees
The top is 3rd challenge for Crafters Companoin and the bottom one is Coloure Creat Challenge, theme is(Blue, Sand, Silver, Black).
I have printed off my backing paper and with a punch cut out a circle and cut it in half . I coloured with my black Copic marker a piece of paper for background and I coloured the duck with copic markers too. Finish it off I used corner peel off and stuck gems on it.
Inside I used the left over backing paper and the 2ND stamped duck.

Saturday, 15 August 2009

I'm back

Oh it's sooooooooooooo nice to be back. I made 24 cards while I was on holiday but had no time to take pic of them and it went for sale. Very simple ones as I don't get too much for it so I don't over do it. I took my stamps and my precious Tim Holtz ink got only 9 but love them to bits and my colouring pencils. I was great to sit down night times and craft without feeling guilty towards OH as he stayed at home. I hope soon I get back into my challenges I joined will take time as I got other commitments too lol