My little Angels not

My little Angels not
2009 Spring

blog background

Followers

Monday 28 March 2011

A tutorial and Sassy Cheryl's card

I'm gonna start with my Sassy Cheryl card. It's Colour me in #16  and on the Challenge blog the theme is: Something new it is a new image after all. I couldn't get both image this week and I had to choose, so I picked the gorgeous Button Flowers bag and a very simple sketch from CDAC sketch challenge. I fell in love with this simple and clean sketch so further -a-do here is my card

 When I took the pick I forgot to colour underneath the bag but I still show you as colours on this much better then above. It was getting dark when I took it outside and by the time I finished colouring it was completely dark so had to take pic inside with flash on. As you can see I paper pieced it. I printed on the green patchwork DP and on the purple patchwork DP then cut the needed bits out. The DP is from TLC Creations Spring/Easter club and WA is from there too. The swirls are one of the freebie from TLC Creations.
 Close up of image(this is the one which forgot to colour but got the true colours)
Here you can see that the button is glitter glued but before I put the glue on I made holes on the heart button and when it was dry I put a shiny purple thread through
And the side view I just bought those dinky buttons yesterday
On one of the forum where I go sometimes one of my friend asked me if I could do a tutorial for her how my images hanging off my die cut, so Betty here you go this is for you

1st step: Get your die and position it over yr image and draw lines inside the die next to the image (some ppl like to drew all the way round but fore enough just little line to indicate where I need to cut)
 Step 2: See  the little lines at the bunny's ear, that show me I got to cut it all the way down to the line to be able to slide my die underneath. Cut from above with one strait line then cut to the right and left to go round the ears. Next 2 picture shows you how
Step 3: once you cut it down the line place your die over the image and make sure the ears (the bit what's gonna hang over the die) is above the die cut so you not cutting the ears off when you put it into your machine.  Sorry for the bad picture quality I didn't realised it till I uploaded my pic onto PC
 Here is a pick from the back so you see how I cut it and how the die got to be before die cutting
 And woala my image after die cutting read to put it on the card.. I hope this little tutorial is clear enough if not let me know which part and I'll correct it. The finished card is one post below.

Thanks popping by
hugs
Ildiko/Ildz

Paper Cupcakes DT card,TioT DT card, Baby Bud DT card and Delicious Doodles DT card

OMW I forgot to hit publish on my post and now I have to do all in one. How did I do it no idea. Maybe to excited that I'm gonna have my 5 burner dream cooker. It's been 4 month since our oven broke down and Adrian just bought the new one over a week ago and it's coming tomorrow (Tuesday). Carpenter is coming in the morning to re size my cupboards as I had only a 4 burner cooker but getting a Ranger Master cook was my dream, so he got it for me. You have no idea how happy I'm. Time for me to learn to bake too as kids bigger now and I don't mind them eating cake at wknds. Alfie already asked if we can make muffin and I told him next week when he's off for Spring holiday we can make some cupcakes probably  apple and cinnamon ones and maybe a cheese and bacon one as Adrian doesn't like cooked fruit, now how silly is that

Anyway I stoped chatting so much and onto my Paper Cupcakes card where we had a recipe to fallow: pink,green and yellow this is a fab combo and her is my card I kept the hole layout simple as the BP is busy. The BP/DP and the WA is from TLC Creations

 On the image I used my cloud stamp to make the image more real.


Over at TioT the theme was Inches min 3. I was so glad to be able to use my inch stamps from  and I used the kids letter stencil too lol

At Delicious Doodles the theme was Flowers. I used the iris image from Teri's shop and Pascale's(who is are sponsor for this week) iris paper. I just wish you could see this in real life, the picture does not show justice. I have tried to take as many pic as possible to show you. I merged the image and paper and printed an extra iris off so I Was able to 3D it. I was gonna ad bit's and bobs but when I finished it just wanted the main iris to be the middle off the attention. It's a simple card I love it. The WA is TLC Creations 
 Inside, the verse been googled
 and a side view, that little dimension just made it really nice and of course the paper from Pascale just tops it up.

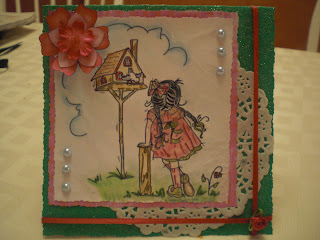
My last card is my Baby Bud card. I have used the free image Baby Bell in my CraftArtist program I flipped her you can check out rest of the gang here and. The paper is TLC Creations Spring/Easter club and MUM just been printed off

 The little flowers from stash with beads in the middle
 And here is the close up.

Thanks popping by
hugs
Ildiko/Ildz

Monday 21 March 2011

Paper Cupcakes DT and Sassy Cheryl's Colour me challenge

Good Morning. Got few minuts to post before I take Alfie to his swimming lesson. First like to show you my Paper Cupcakes tag. This week is a Vintage tag/card week and a freebie as well. When I Was using this flower I wasn't so sure it's gonna turn out the way I wanted it but it has so I'm happy with the effect
Here is my offering


 And here is my 2nd card for Colour me #15. I picked this cutie to colour and was such a fun. This is Cheryl's $2 for this week to colour. I'm just in time to enter it so off I go to link
 As usual my WA is TLC Creations and from the new Easter/Spring club

 The chick in the bottom looks so sweet. I had her for abt 2-3 yrs so it was time to use it lol

oops I forgot one more thing but got to waittill I'm back lol
Thanks popping by
hugs
Ildiko

Sunday 20 March 2011

Delicious Doodle DT card and Wax Fruit Co challenge


Over at Delicious Doodles is challenge #17. And the theme is 3D, this is easy, I'm sure we all 3D our cards now days one way or other. For this project I used the ship image, just perfect for 3D effect. I had to print it off few times to colour it for this design but I love the effect. The only thing is next time if I do anything like this I have to do bigger zig-zag for the side to show the effect better. The paper I used is TLC Creations and the WA inside the ship too the bottom sentiment is from on-line. Ah just remembered I used 2 kind of paper and the top is MCS CD
Well here is my card

For my Wax Fruit Co card I have used this gorgeous set of tulips and TLC Creations papers. After cutting my image out I had a few left over strip of paper. I was going to through it in the bin but after fiddling with it while I was watching I ended up with a knot and I thought it would look fab on the card, so it ended up on the ribbon. See even the little strip of paper what we would normaly through away can be used lol
And my card
 I paper pies the tulips and slightly I raised it with glue gel
 I just love this paper knot
Thanks popping by
hugs
Ildiko 

Wednesday 16 March 2011

Chocolate Thearapy

This week Michelle picked the theme on TioT and it's yummy yummy Chocolate. This is a free choice, as long as you stick to the theme you can make whatever you like. Not long ago it was Michelle's birthday (Happy Birthday although it's a bit late) and her 1st wedding anniversary I can't believe how time flys. I haven't got a new cooker(it's been ordered now so few more weeks now. I lasted over 2 month without oven) so I couldn't bake. So I had to make a card. I was going to make something else but then I went to see my friend who is not well and had no time so it's gonna be for an other challenge.
Here is my offering

 Recipe
Joanna Sheen stamps
Cutllebug die/embossing folder
Ribbon from stash
Tim Holtz distress inks

I have inked up my folder before placing my paper inside, this way I got this lovely effect and where it's been inked up the embossing is colour. Next I embossed/die cut my card base and just placed the other one on the top, but before I done that I put a ribbon round it. I stamped my sentiment with TH ink and strait away I used a wet brush too pull the colour then I edged it with darker ink but not to visible on the pic.
Inside there is a bar of chocolate. I stamped with TH ink and again used a wet brush to push the colour round where it was needed, on the chocolate itself I used darker brown too. The chocolate cover is coloured with silver pro-marker. Just realised I forgot to take a close up on my chocolate bar. I think the reason for this cos I was thinkig of having some choc lol I never had any though
 I'm really sad cos this folder is not mine. Soon I got to give it back to my friend. I think I might have to get it myself although we did agree we wont get the same things so we can swap round but I just LOVE this one just goes with any kind of card type
I have to tell you the DT came up with some fab ideas, just pop over to the TioT blog and have a look

Thanks popping by
hugs
Ildiko

Monday 14 March 2011

My Delicious Doodle DT card and Paper Cupcakes DT card, a Sassy Cheryl's Challenge and a Baby Bud card and lets not leave out Show me

Oh boy I've got sooooooooo many cards to show you in one post. I was gonna make different posts but I thought it'll be better to show you all here.( i have hairy legs)
First let me tell you my big news. I'm in the Paper Cupcake DT I was sooooooooooo happy when I found out. I was bursting to tell you. And we got an easy challenge for you. Monochrome. So let your mind go wild and enjoy creating and playing with one colour. You'll be amazed how much you can do with one colour in different shades.Here is my card for you to see, oh actually I made two and it's two different style

This is a Vintage looking using shade of brown
My BP/DP is Bearly Mine what I edged with TH distress ink. My image is water coloured also distressed and put a brown shade of yarn round it. My paper flower also distressed and so is my WA which is a TLC WA

This is my pink one using different shades. The paper is from Funky Fairy and got tissue paper on the top edged with black pen to give a bit of definition. My ribbon was a bit tricky. I was playing with it and in the end the middle turned into some kid of flower and I just glued it and glued an other flower top of it. I cut some paper strips from the papers and placed my Yummy cupcake on it. Finished it of with fat pearl and a TLC sentiment.
My 2nd card oh no my 3rd card is my Delicious Doodles card. As St Patrick is coming up we asked you to use green, I'm sure you can do that. Just pop to Teri's shop and check it out
I have used Shamrock Fairy, TLC WA&DP. I coloured this beauty with mt water colour pencils and bit of  distress ink on the edge. The WA been distressed too. The flowers my mum crochet it for me.

My 4th card is my Sassy Cheryl's card. I might be to late to post it for the colour me in challenge but I still show you
I have to tell you this was a challenge to colour. Cheryl she is gorgeous and still was fun to colour her. I didn't have much time to make this card. I did have my image coloured up so just needed to cook a card up lol There was an other 2 image to choose so pop over here and have a look. Oh Nooooooooo I was to late for this game
And my last card is my Baby Bud card the images can be found in the Etsy shop. I had some left overs from the above cards and I had my cutie coloured and cut out so it was only few minutes to put it together.
Oh I almost forgot to show you the table where I was working the other day. This is for show me #15
This is how I started just colouring
and his is what I had in few hrs time lol when I make card/s
Phew so much in one post lol out of the 5 card I made 3 yesterday, just had no time to come online. I went to see a crafty friend in Folkstone she's only abt 50 min train ride away from me. This was the 1st time we met, she needed some cheering up as her life(health) is upside down and top of that her 15 yrs old daughter walked out on her so when I heared this I just had to jump on the train and see her. Being a mum myself I admire her that she can still smile.
Thanks popping by
hugs
Ildiko

Friday 11 March 2011

Two cards in one post

I forgot to post my TIOT tag. I picked the theme and as it was woman's day on the 8th I thought the theme is just appropriate. I had fun making my tag. Mixed digi with stamping. I have used Nana Vic digi &TLC Creations digi and Bearly Mine Digi paper
It's a big tag but will look good on an A5 card or a DL card. The stamp I embossed and it's a free stamp from Craft Stamper magazine
I have used liquid pearl
Just a close up on the corner

My 2nd card is a D2D image called Lucky Bird, I played along with their challenge. If you play along you get a free digi. The deadline in few hrs and I forgot all abt it. The WA and digi paper is TLC Creations
A had an accident with my topper took me  while to hide it. I had a huge red smudge on it, by mistake I put it on a drying liquid pearl lol but I did cover it eventually lol
I used ribbon and doodled some stitches on it
Thanks popping by
Ildiko